Tile adhesive is the foundation of any great tiling project. Getting the mix right is crucial for the durability and finish of your tiled surface. Whether you’re tackling a DIY project or are a seasoned professional looking to brush up on your skills, this guide will walk you through the process of mixing tile adhesive for optimal results.
Understanding Tile Adhesive
Before diving into the mixing process, it’s important to understand the types of tile adhesive available and select the right one for your project. Tile adhesives come in two main types: pre-mixed pastes and powder adhesives. Powder adhesives need to be mixed with water and are suitable for high-moisture areas and larger tiles, offering a stronger bond. Pre-mixed pastes are convenient for small areas and tiles but are not suitable for high moisture areas or larger tiles.
Materials and Tools Needed
- Tile adhesive (powder)
- Clean water
- Mixing bucket
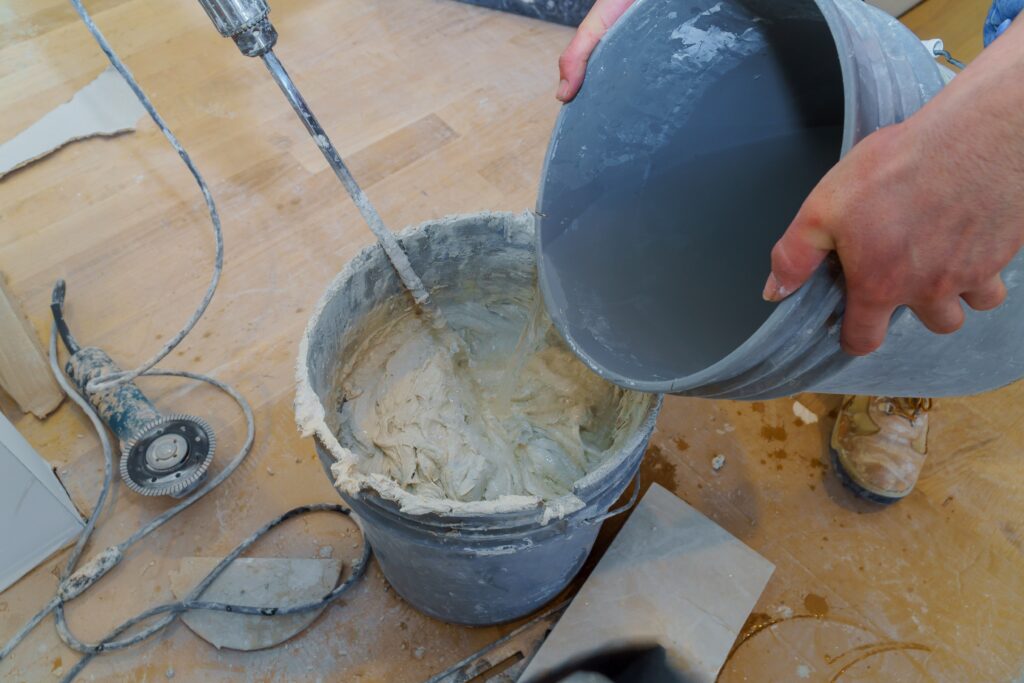
- Electric drill with a mixing paddle or a manual mixing tool
- Measuring jug
- Safety equipment (gloves, mask)
Step-by-Step Mixing Guide
- Read the Manufacturer’s Instructions: Always start by reading the instructions on the tile adhesive package. Different adhesives have specific water-to-powder ratios and mixing times.
- Prepare Your Workspace: Ensure your mixing area is clean, with enough space to work comfortably. Wear your safety equipment to protect your skin and lungs from dust.
- Measure the Water: Using your measuring jug, measure the amount of water needed according to the manufacturer’s instructions. Pour the water into the mixing bucket first. This helps prevent clumping.
- Add Tile Adhesive Powder: Slowly add the powder to the water while continuously stirring. This gradual addition helps achieve a lump-free mix.
- Mix Thoroughly: Use your electric drill with a mixing paddle on a low to medium speed to mix the adhesive. If you’re mixing by hand, use a manual mixing tool and stir vigorously. Mix until you achieve a smooth, lump-free consistency. The adhesive should be thick enough to hold its shape but not too stiff or runny.
- Let it Slake: Once mixed, allow the adhesive to sit for 5-10 minutes. This process, known as slaking, helps the chemicals in the adhesive fully activate.
- Stir Again: After the slaking period, give the adhesive another thorough stir without adding more water. This ensures any chemical reactions are complete and the adhesive is ready to use.
- Use the Adhesive Promptly: Once mixed, tile adhesive begins to set. Use the adhesive within the working time specified by the manufacturer to ensure the best results.
Tips for Success
- Consistency is Key: Aim for a consistency similar to peanut butter. If the mix is too thick or too thin, it won’t provide a reliable bond.
- Temperature Matters: Mix and apply adhesive in a temperature-controlled environment. Extreme temperatures can affect the setting time and strength of the adhesive.
- Mix in Small Batches: Only mix as much adhesive as you can use within its working time to avoid waste and ensure quality.
Conclusion
Mixing tile adhesive correctly is essential for a successful tiling project. By following these steps and tips, you’ll ensure a strong bond and a beautiful finish for your tiles. Remember, taking the time to mix your adhesive properly can make all the difference in the durability and appearance of your tiled surface. Happy tiling!